

Par 3 Course
The latest addition to our facilities is our spectacular Par 3 Course.
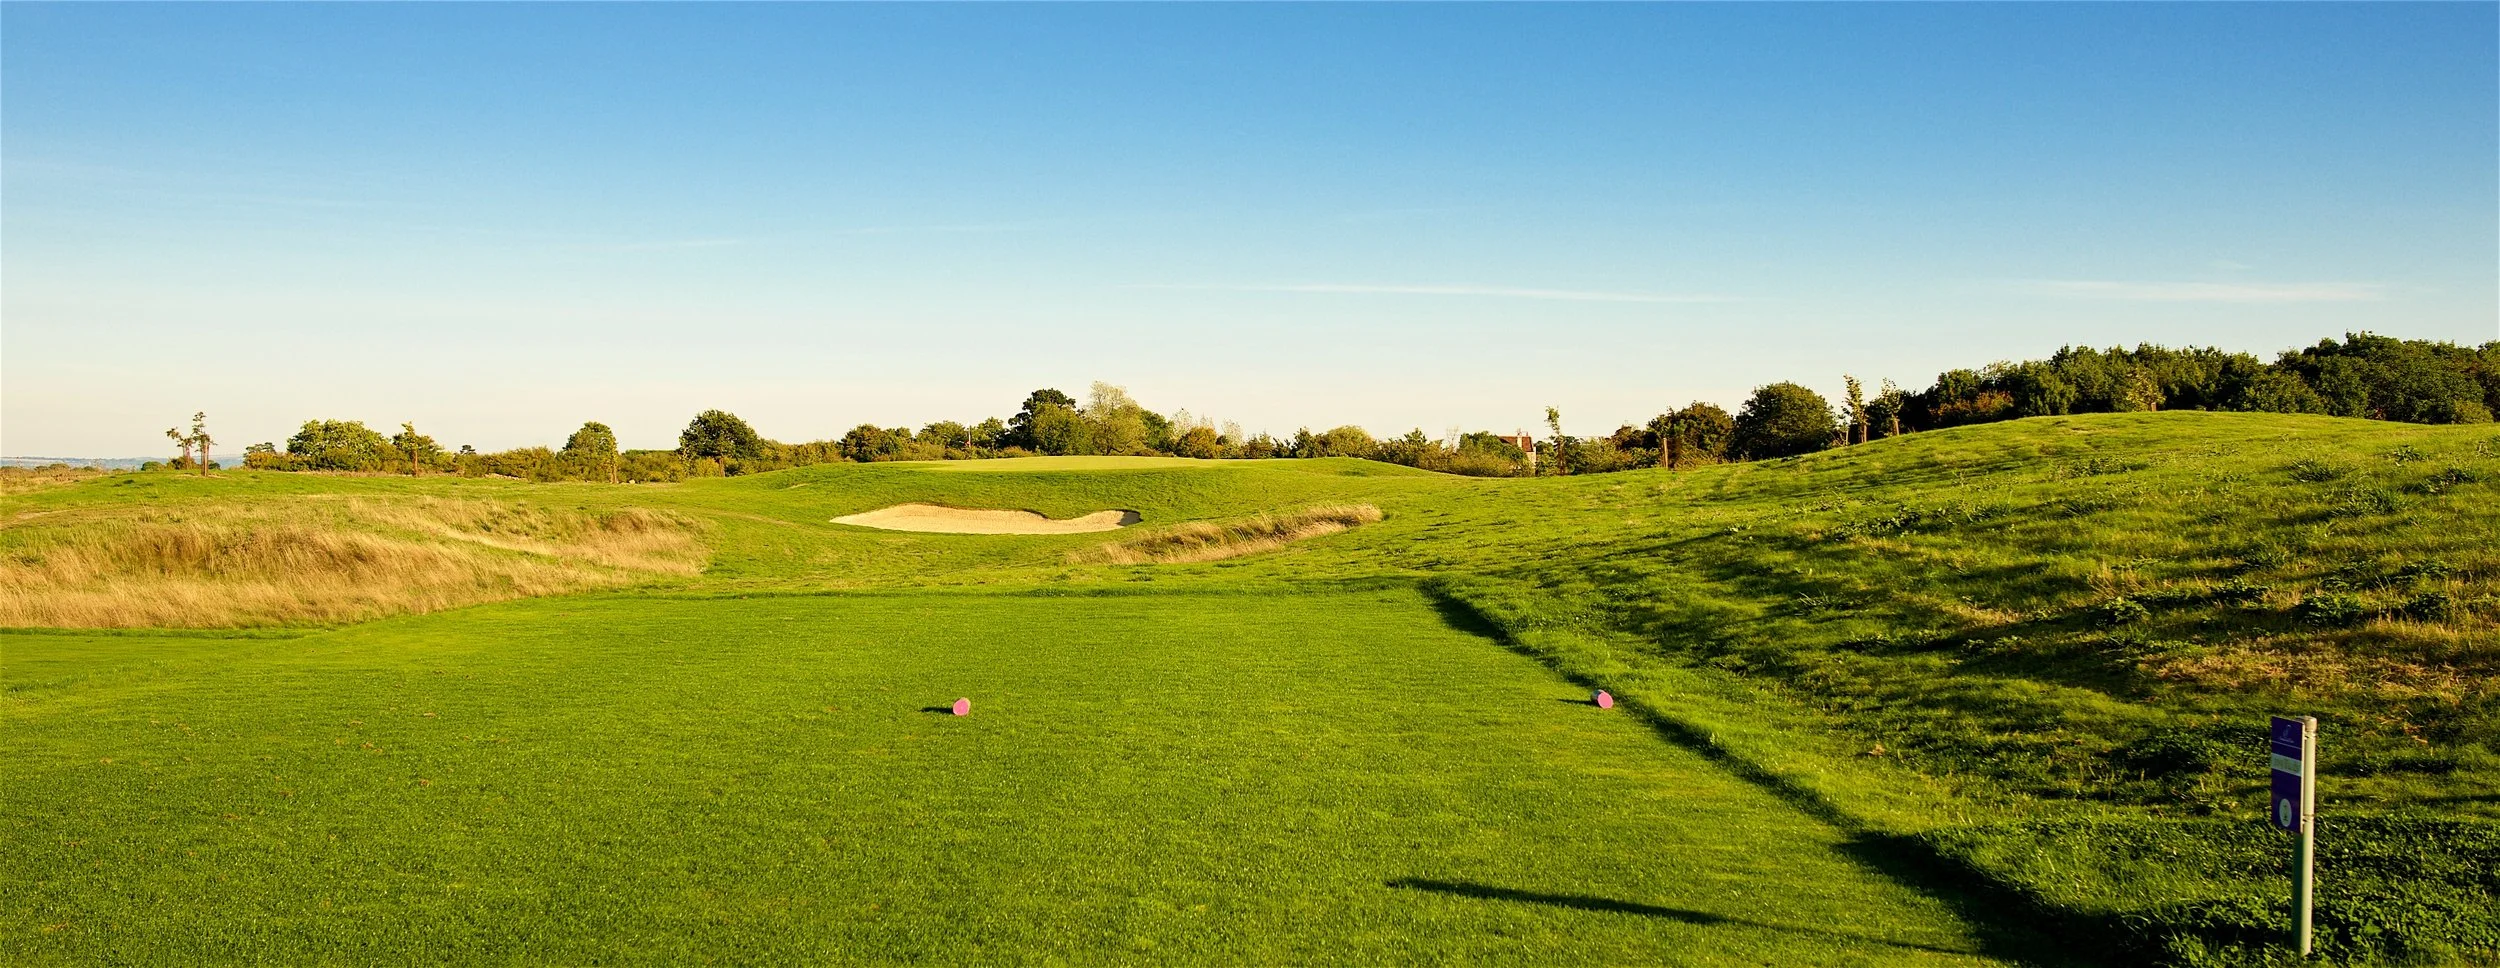
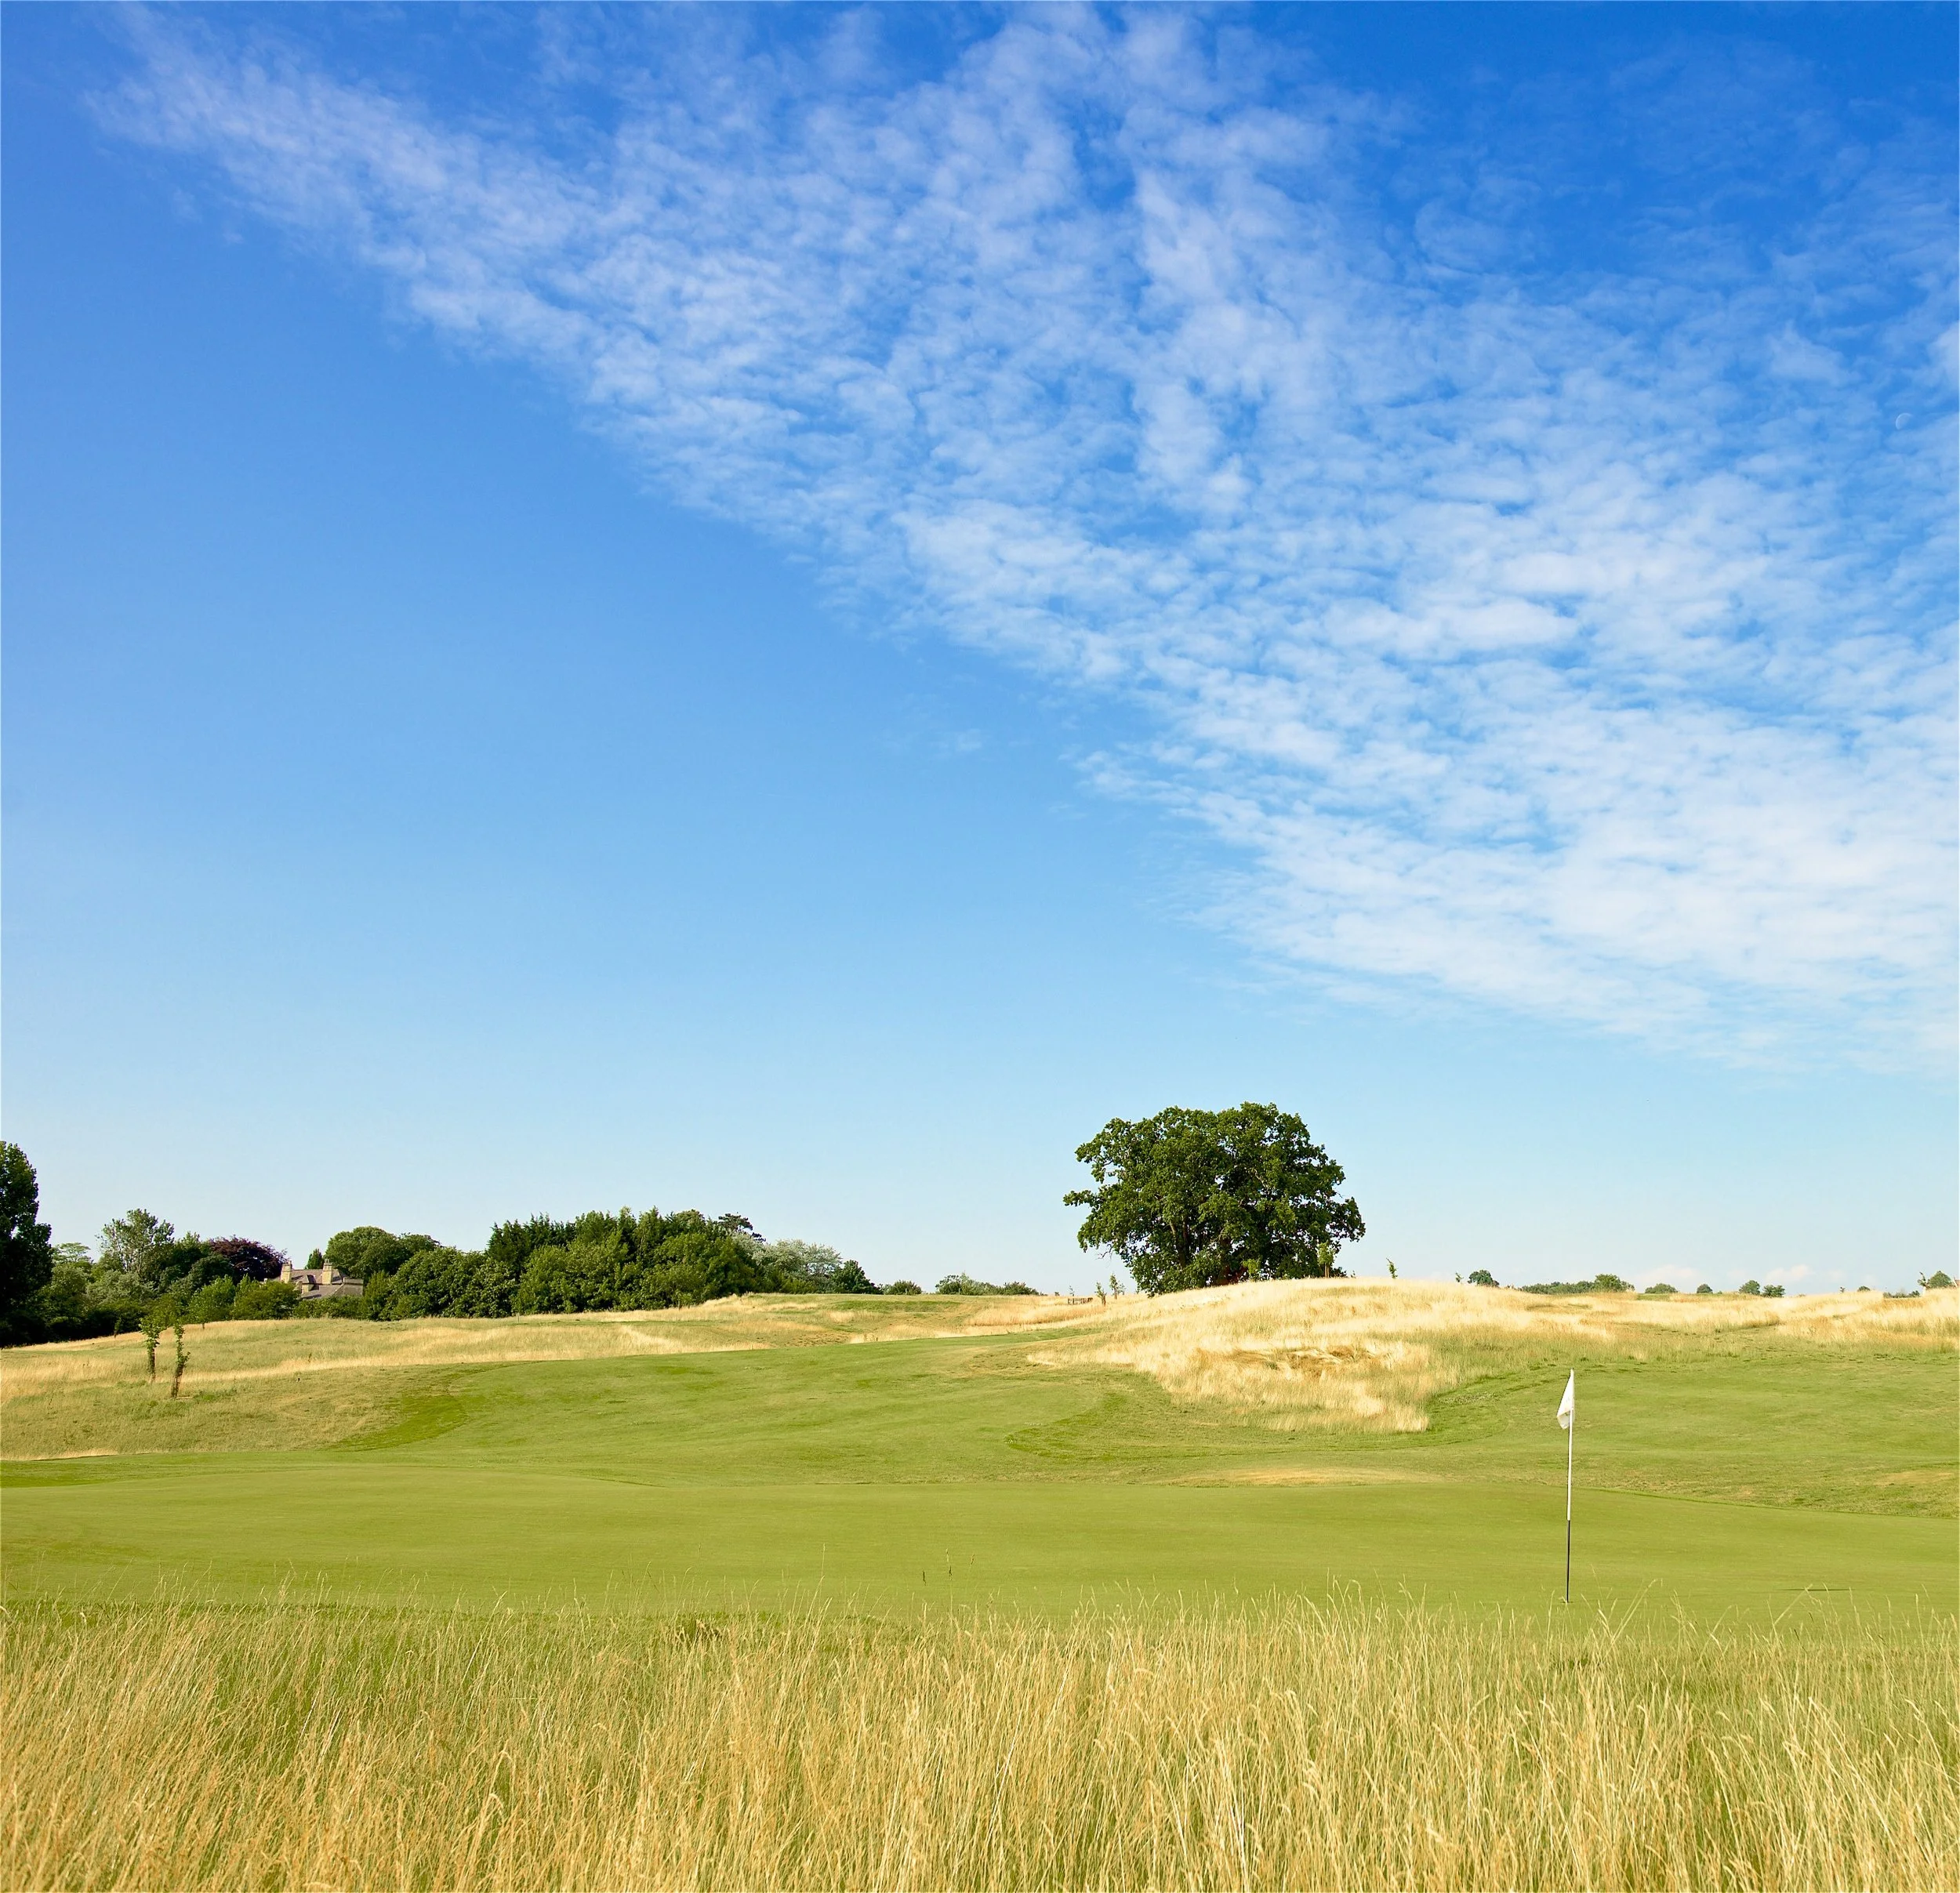
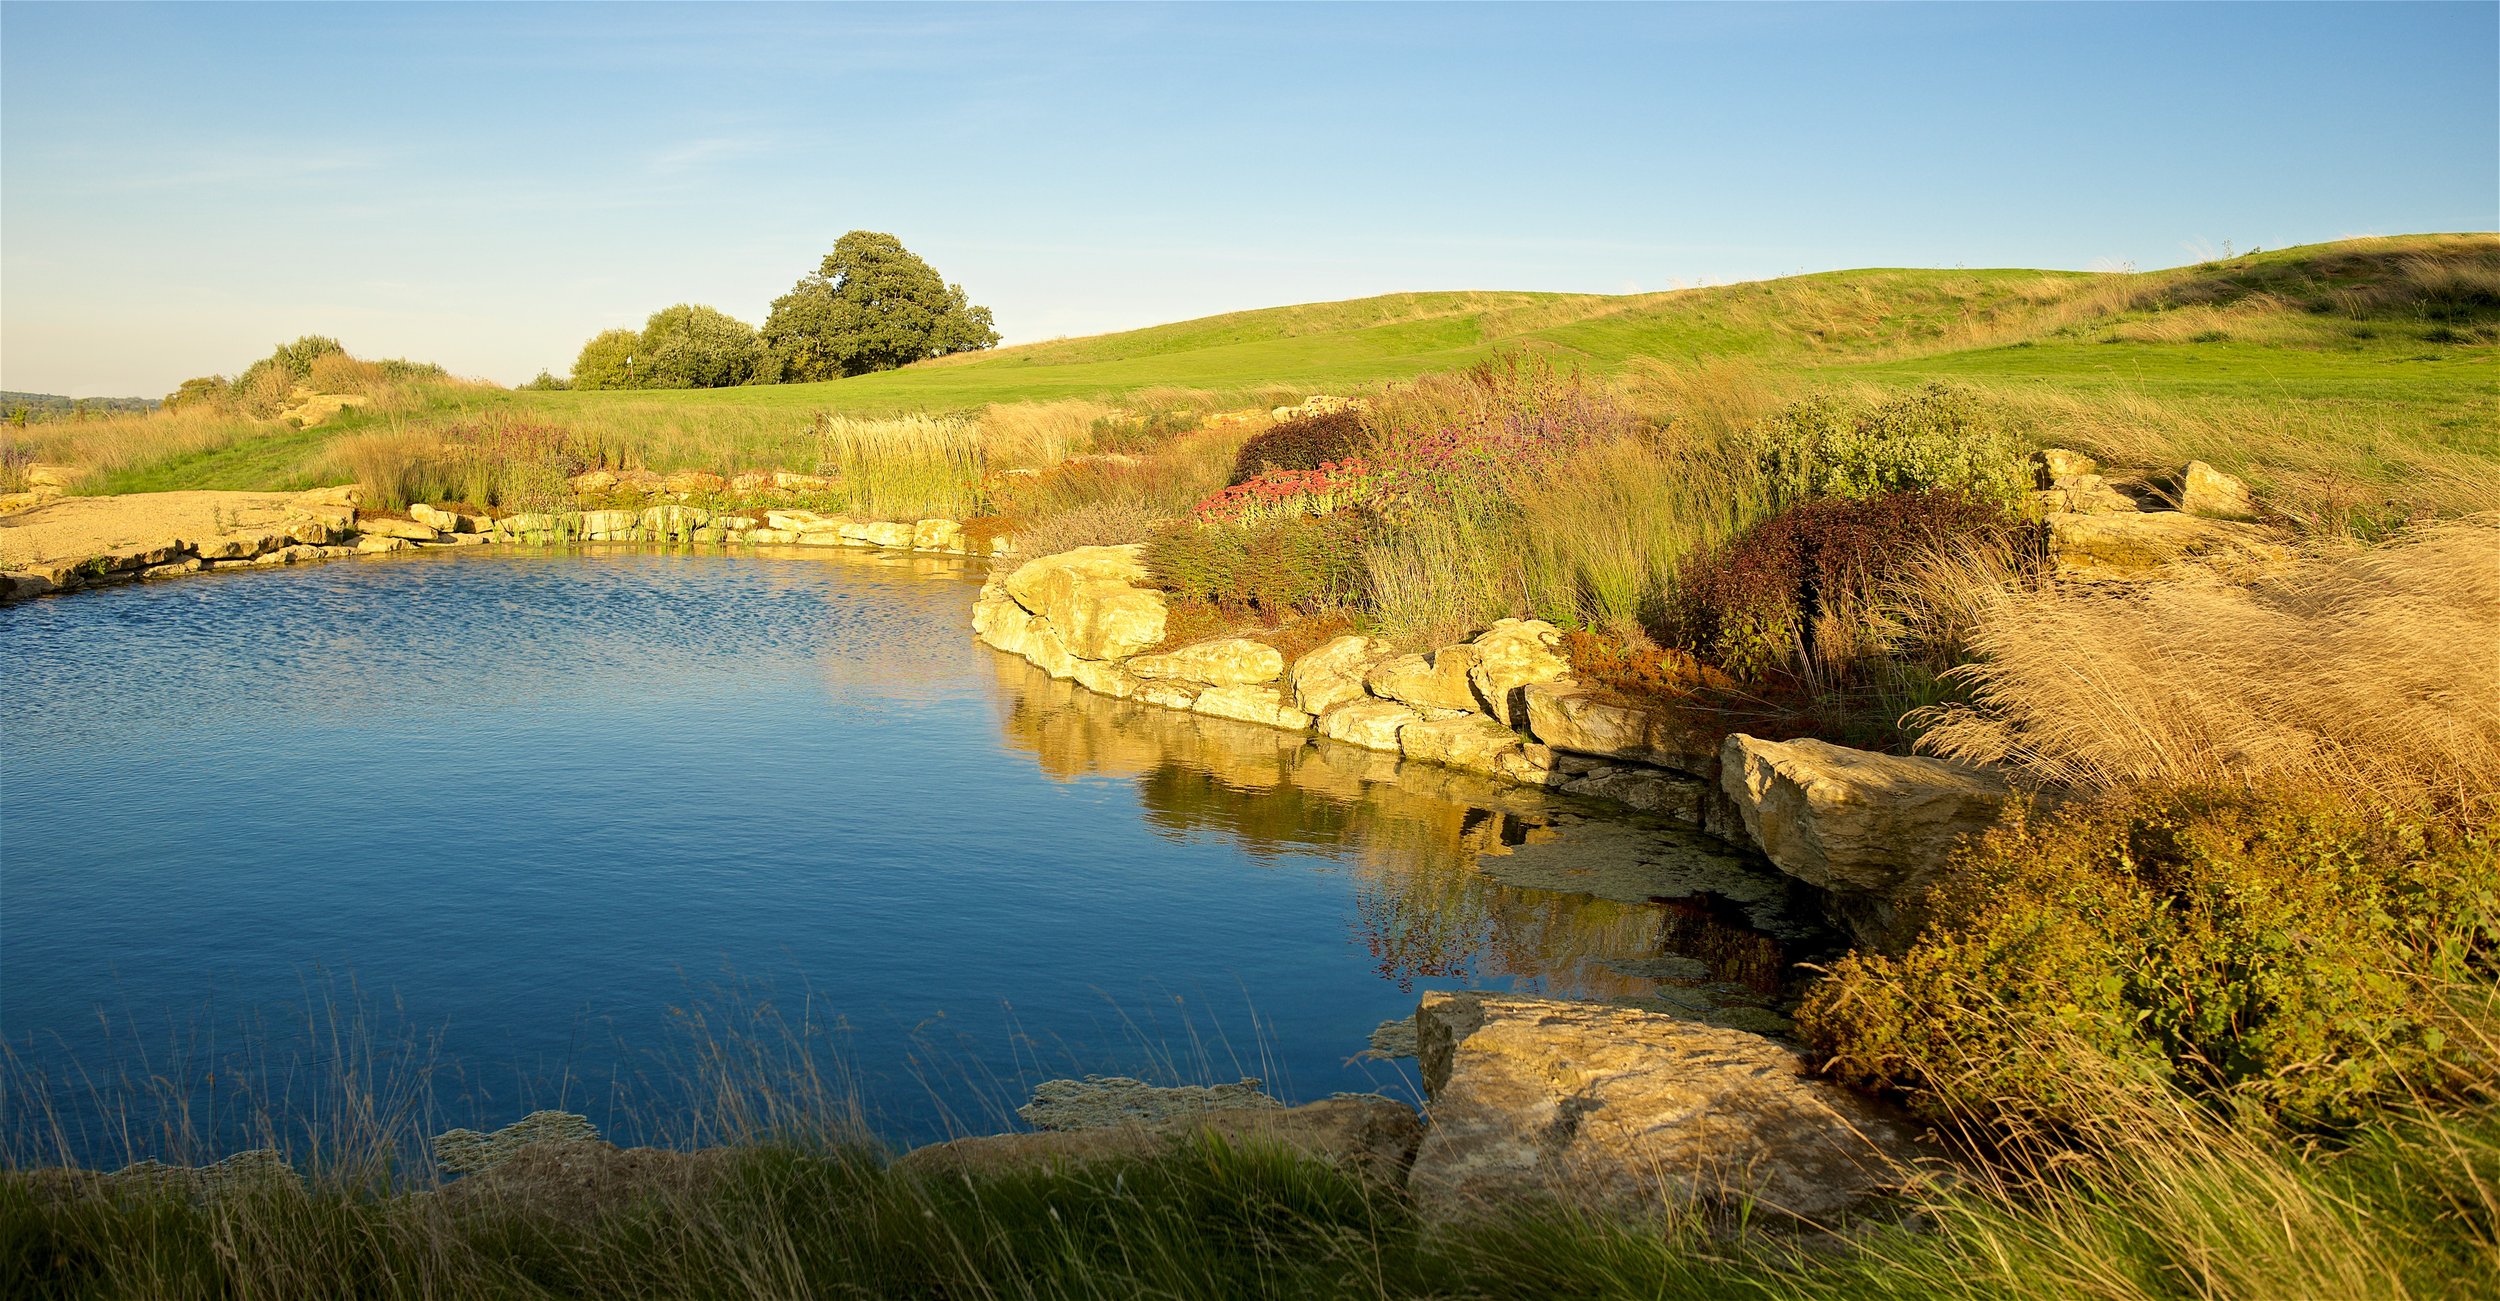
Par Three 1st Hole
A deceptively tough short-hole opener with a Fortress, Table Top Green which is not quite in full view from the tee
Know the yardage to the middle of the green, and play to this (the widest part), regardless of the pin placement, otherwise the heavily guarded fortress green could cost you dearly.
Tees and Yards
Purple: 109 yards
Orange: 101 yards
Blue: 86 yards
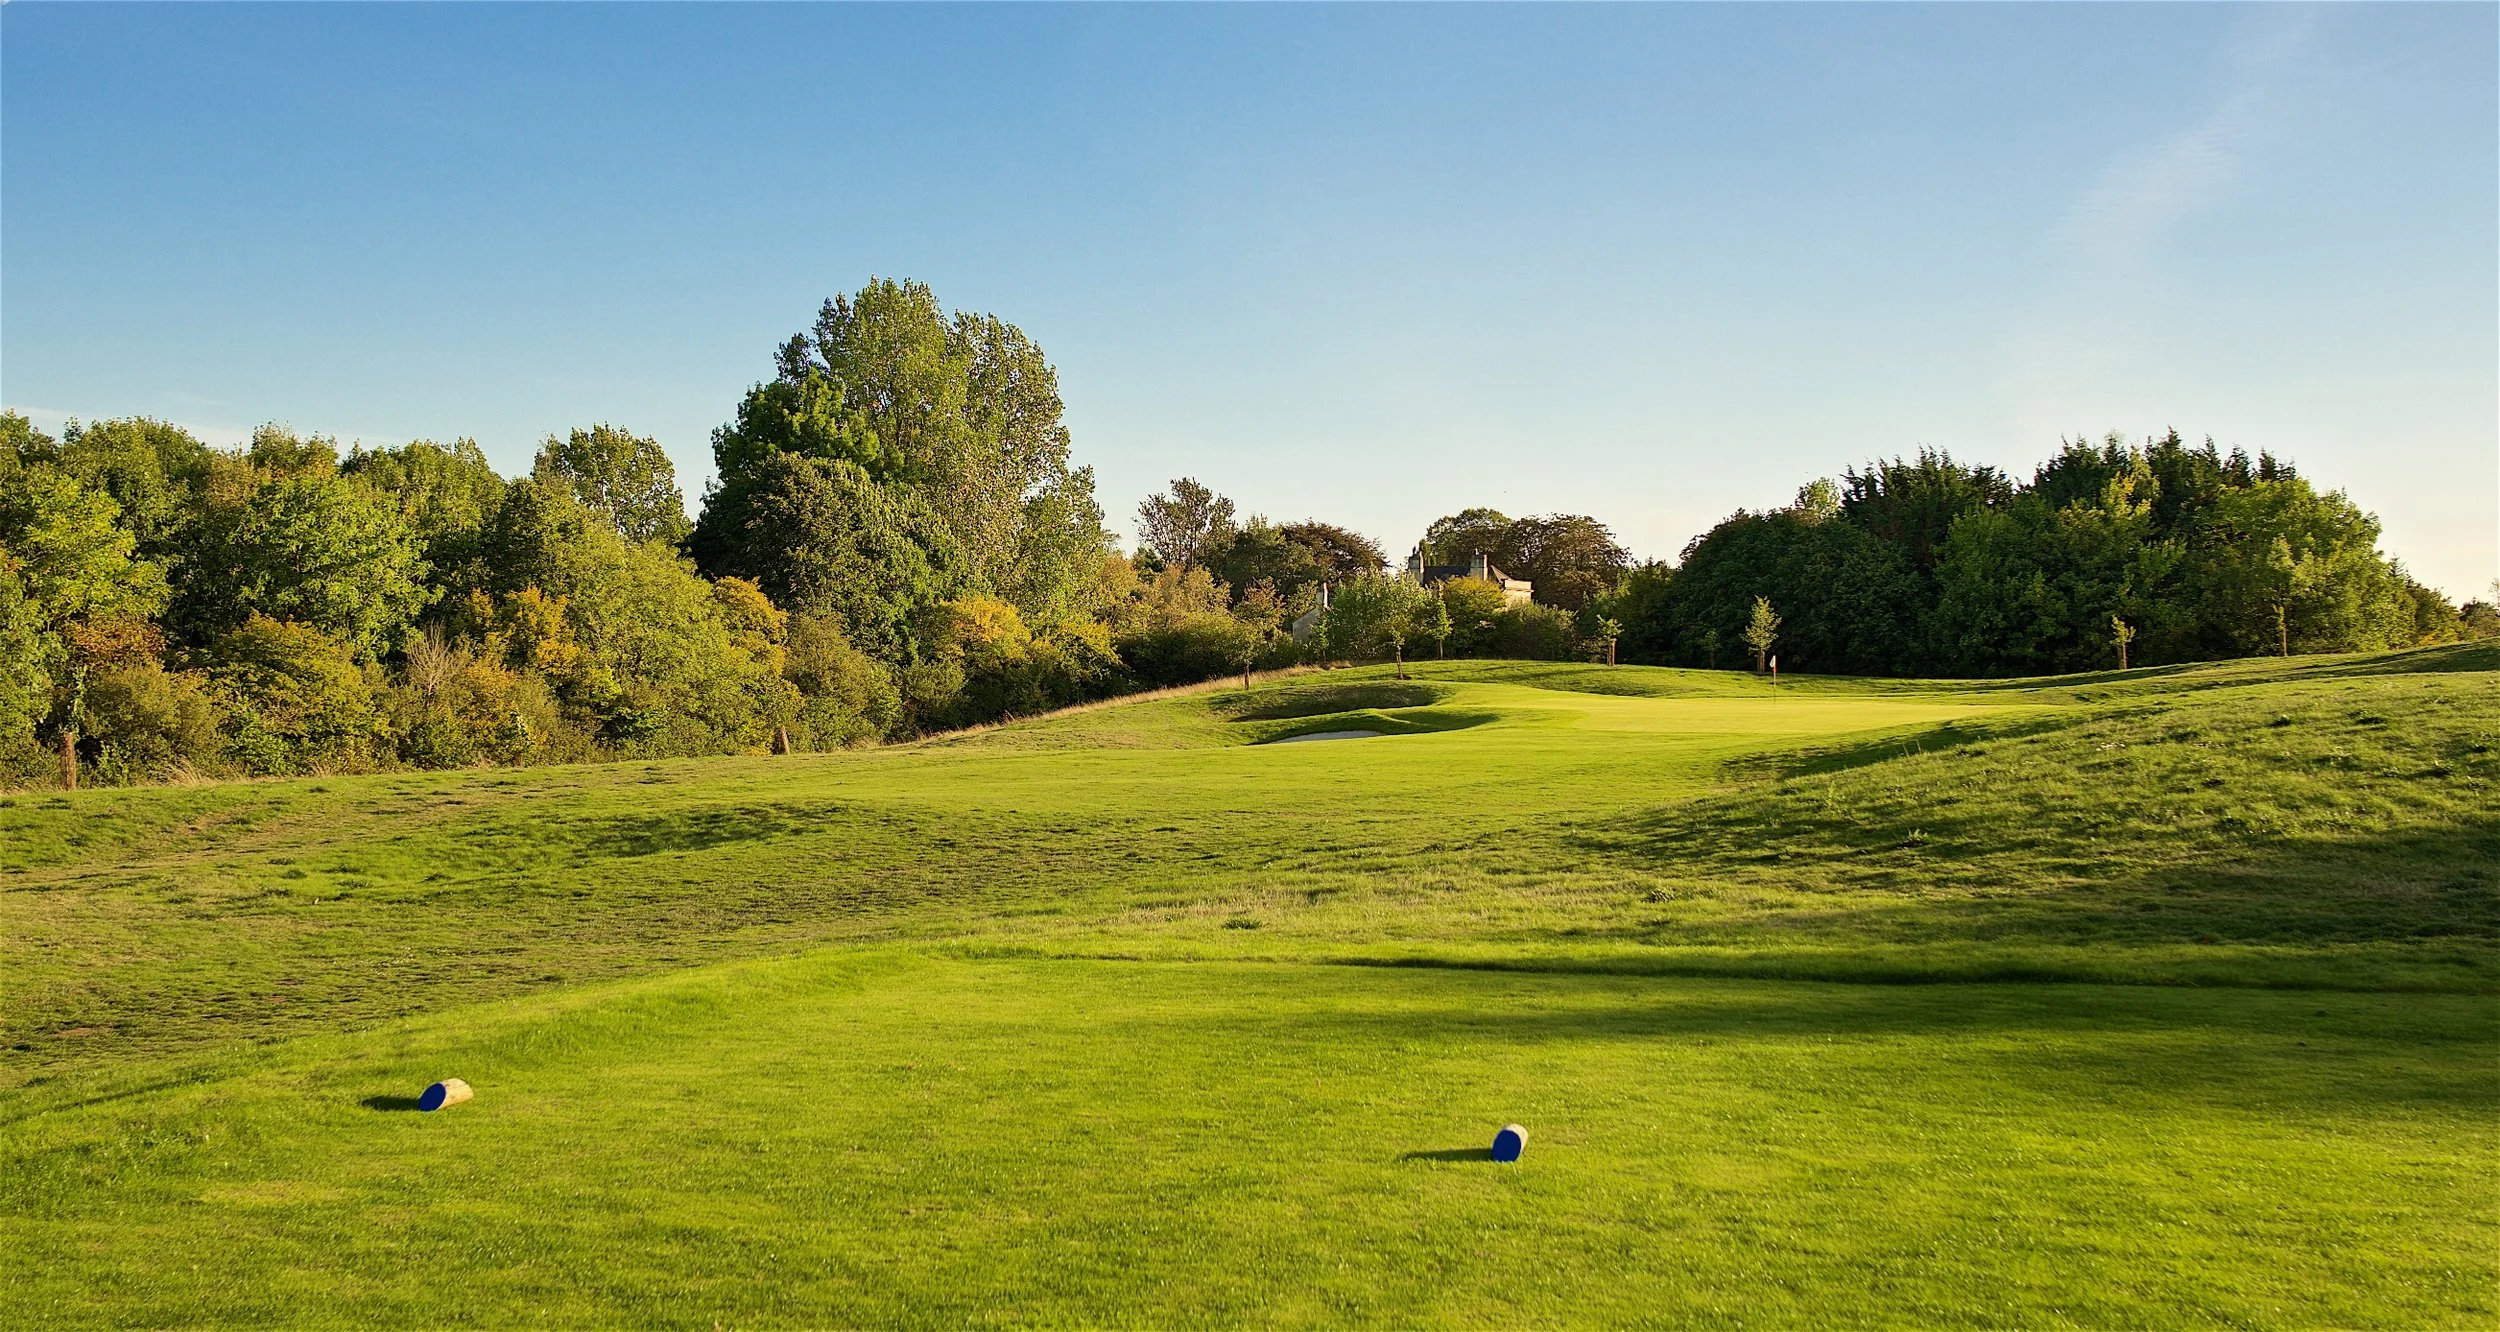
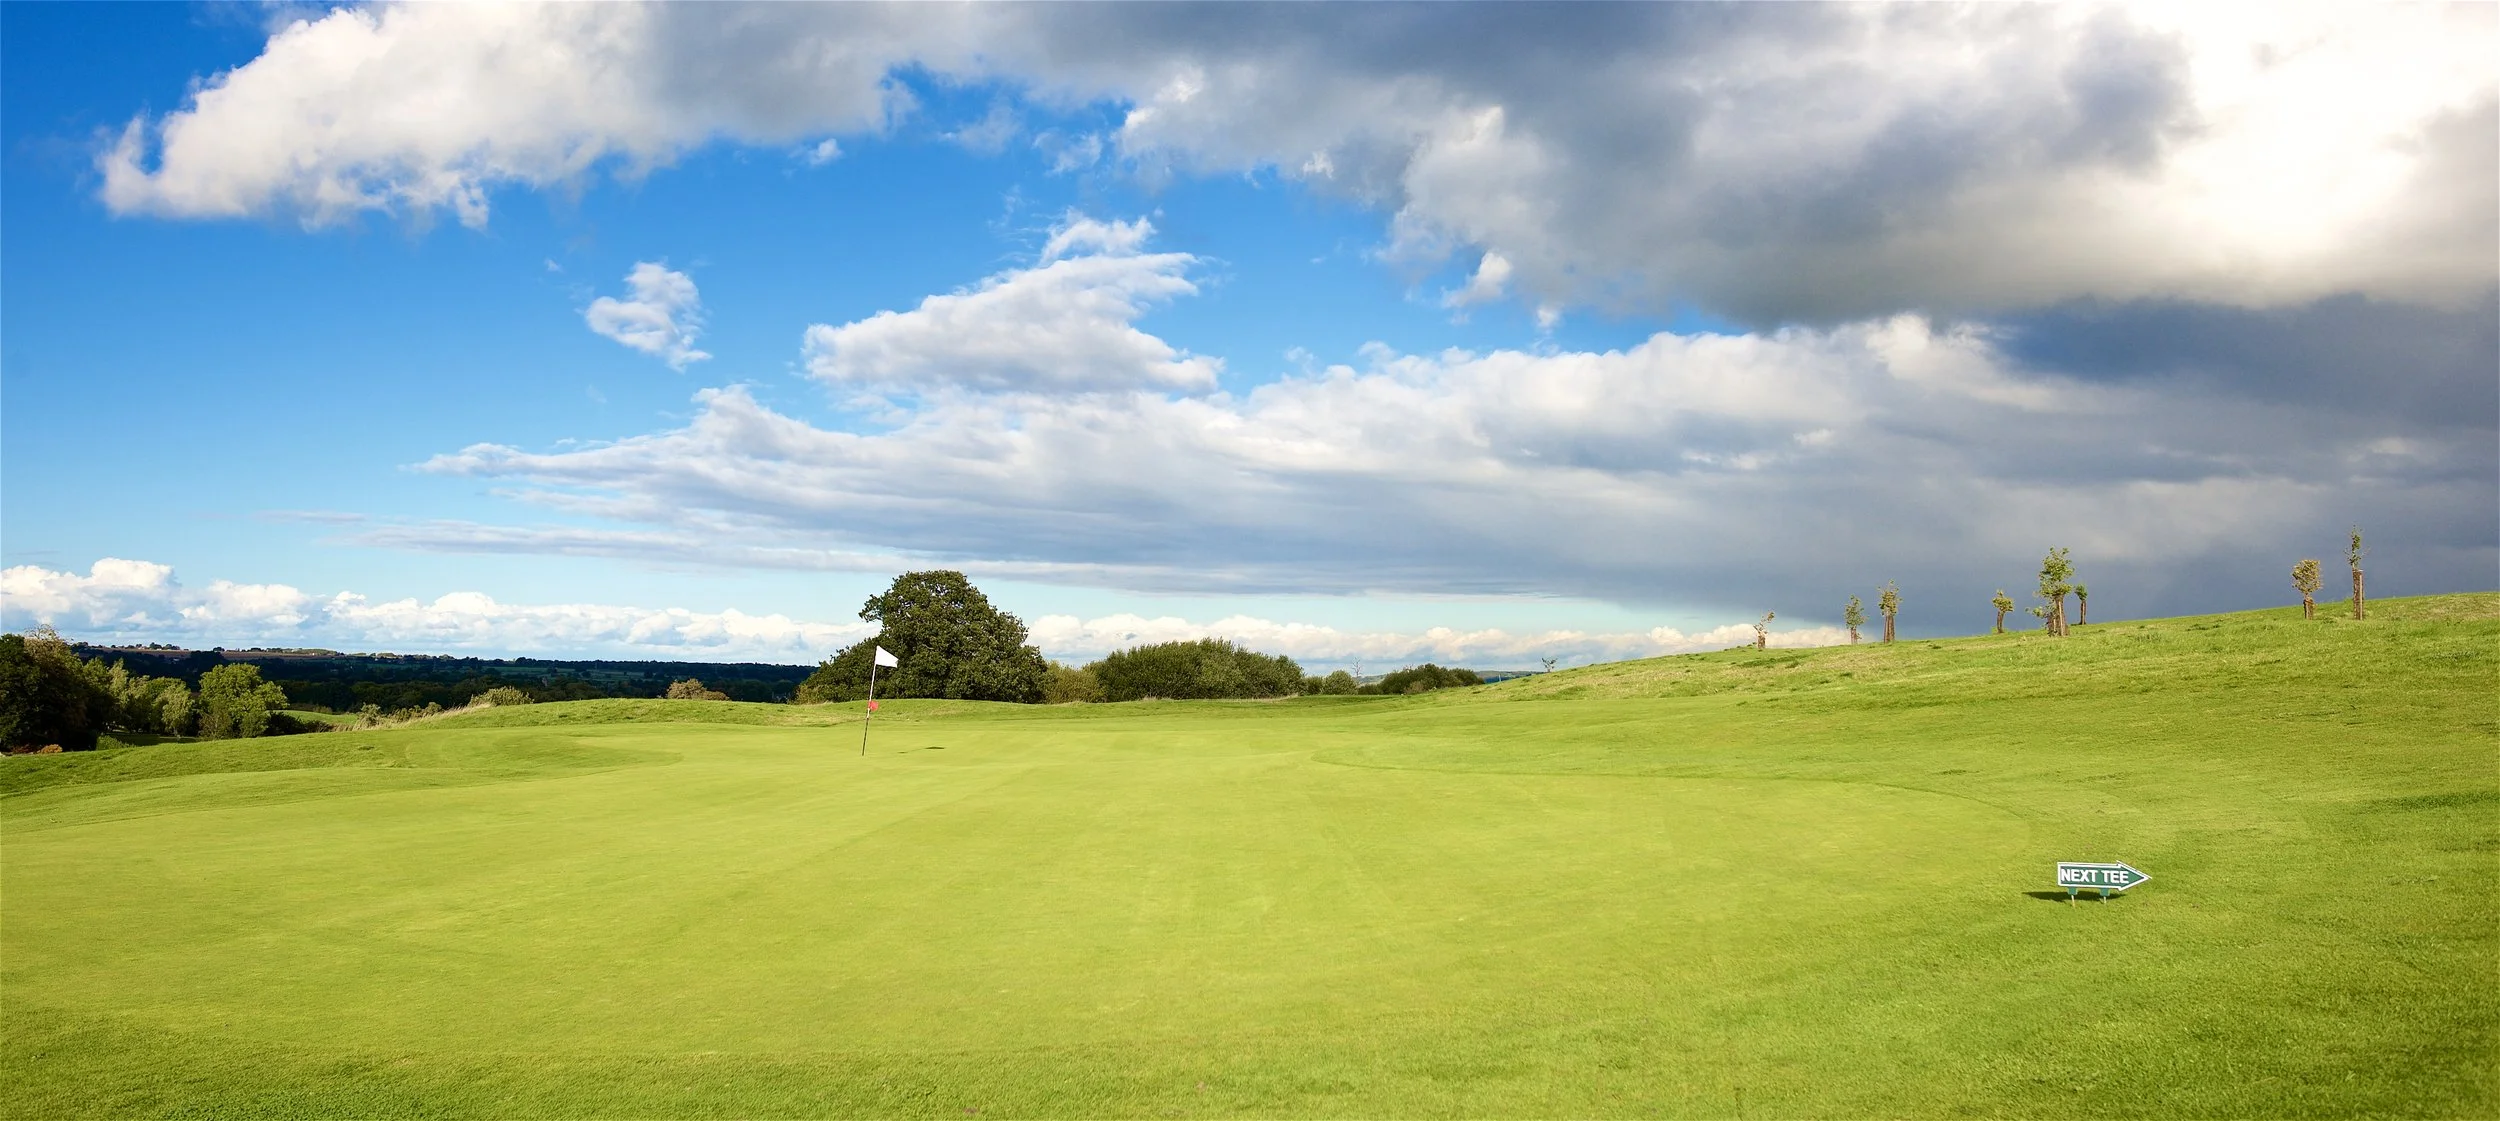
Par Three 2nd Hole
A slightly longer shot required for this one, the green is beautifully framed by the surrounding hedges and trees to the side.
Often playing into the prevailing wind, the tee shot frequently requires an extra club from the tee. It’s an easier up and down from the right, and keeps you away from those deep left hand bunkers
Tees and Yards
Purple: 165 yards
Orange: 156 yards
Blue: 95 yards
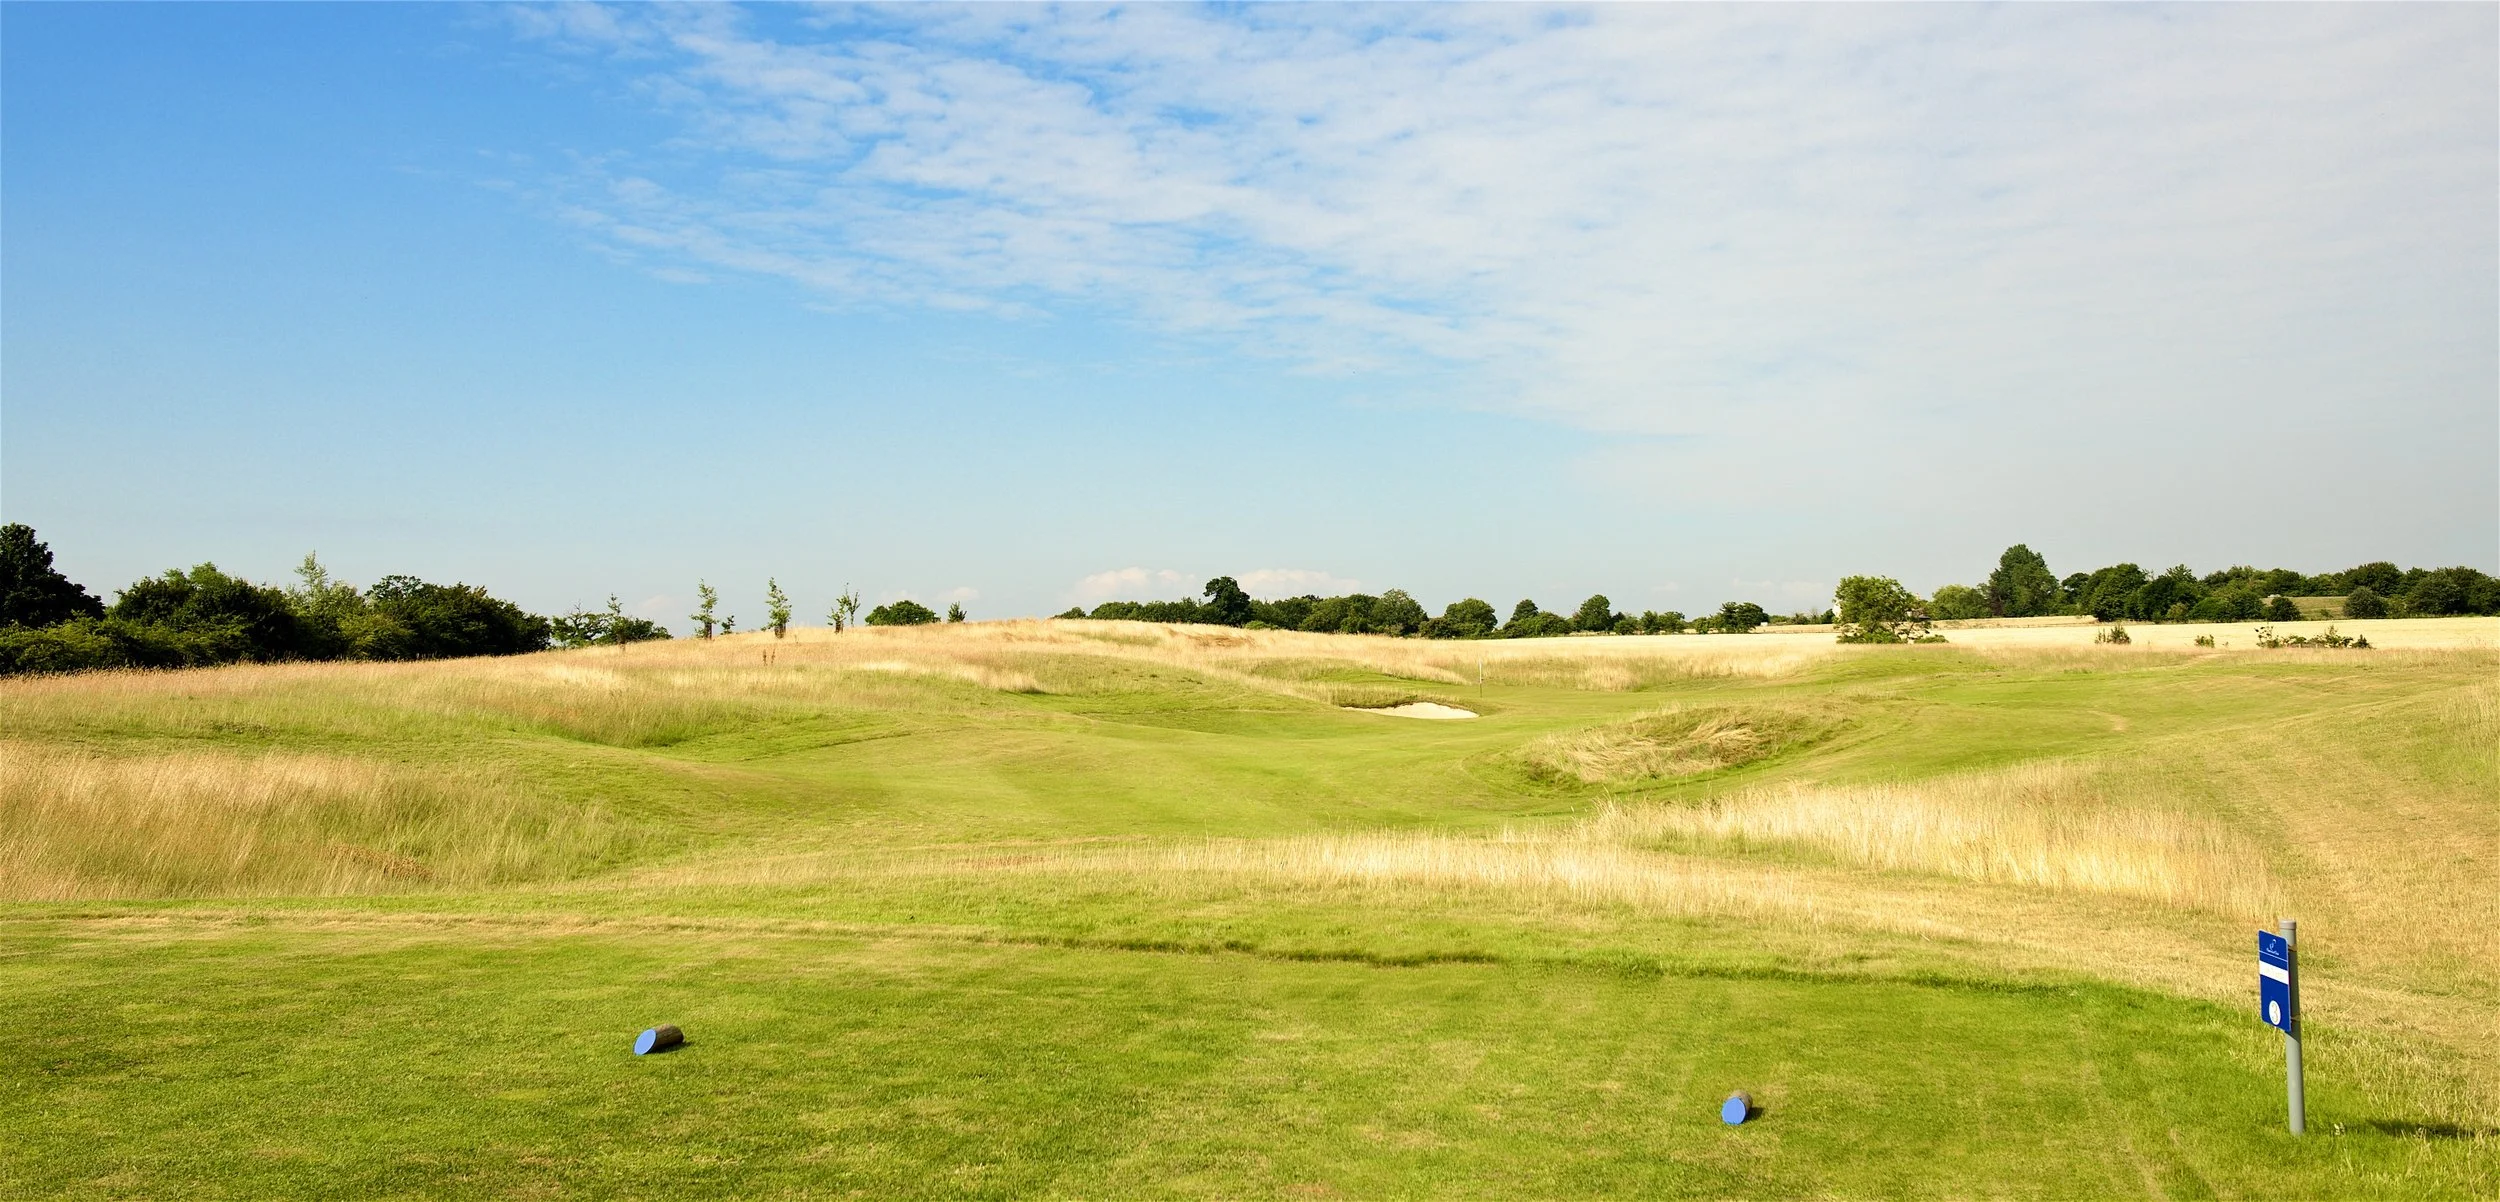
Par 3 Course - 3rd Hole
A lovely undulating fairway faces you from the tee, with a swirl of the longer grass right in the middle of it which can hopefully be avoided.
A straightforward par 3, but it hides a tricky bunker to the right of the green. Again often into the wind, players regularly take too little club, hit it too high, and often come up short. A much tougher hole if the pin is tucked up in the far right hand corner.
Tees and Yards
Purple: 141 yards
Orange: 123 yards
Blue: 106 yards
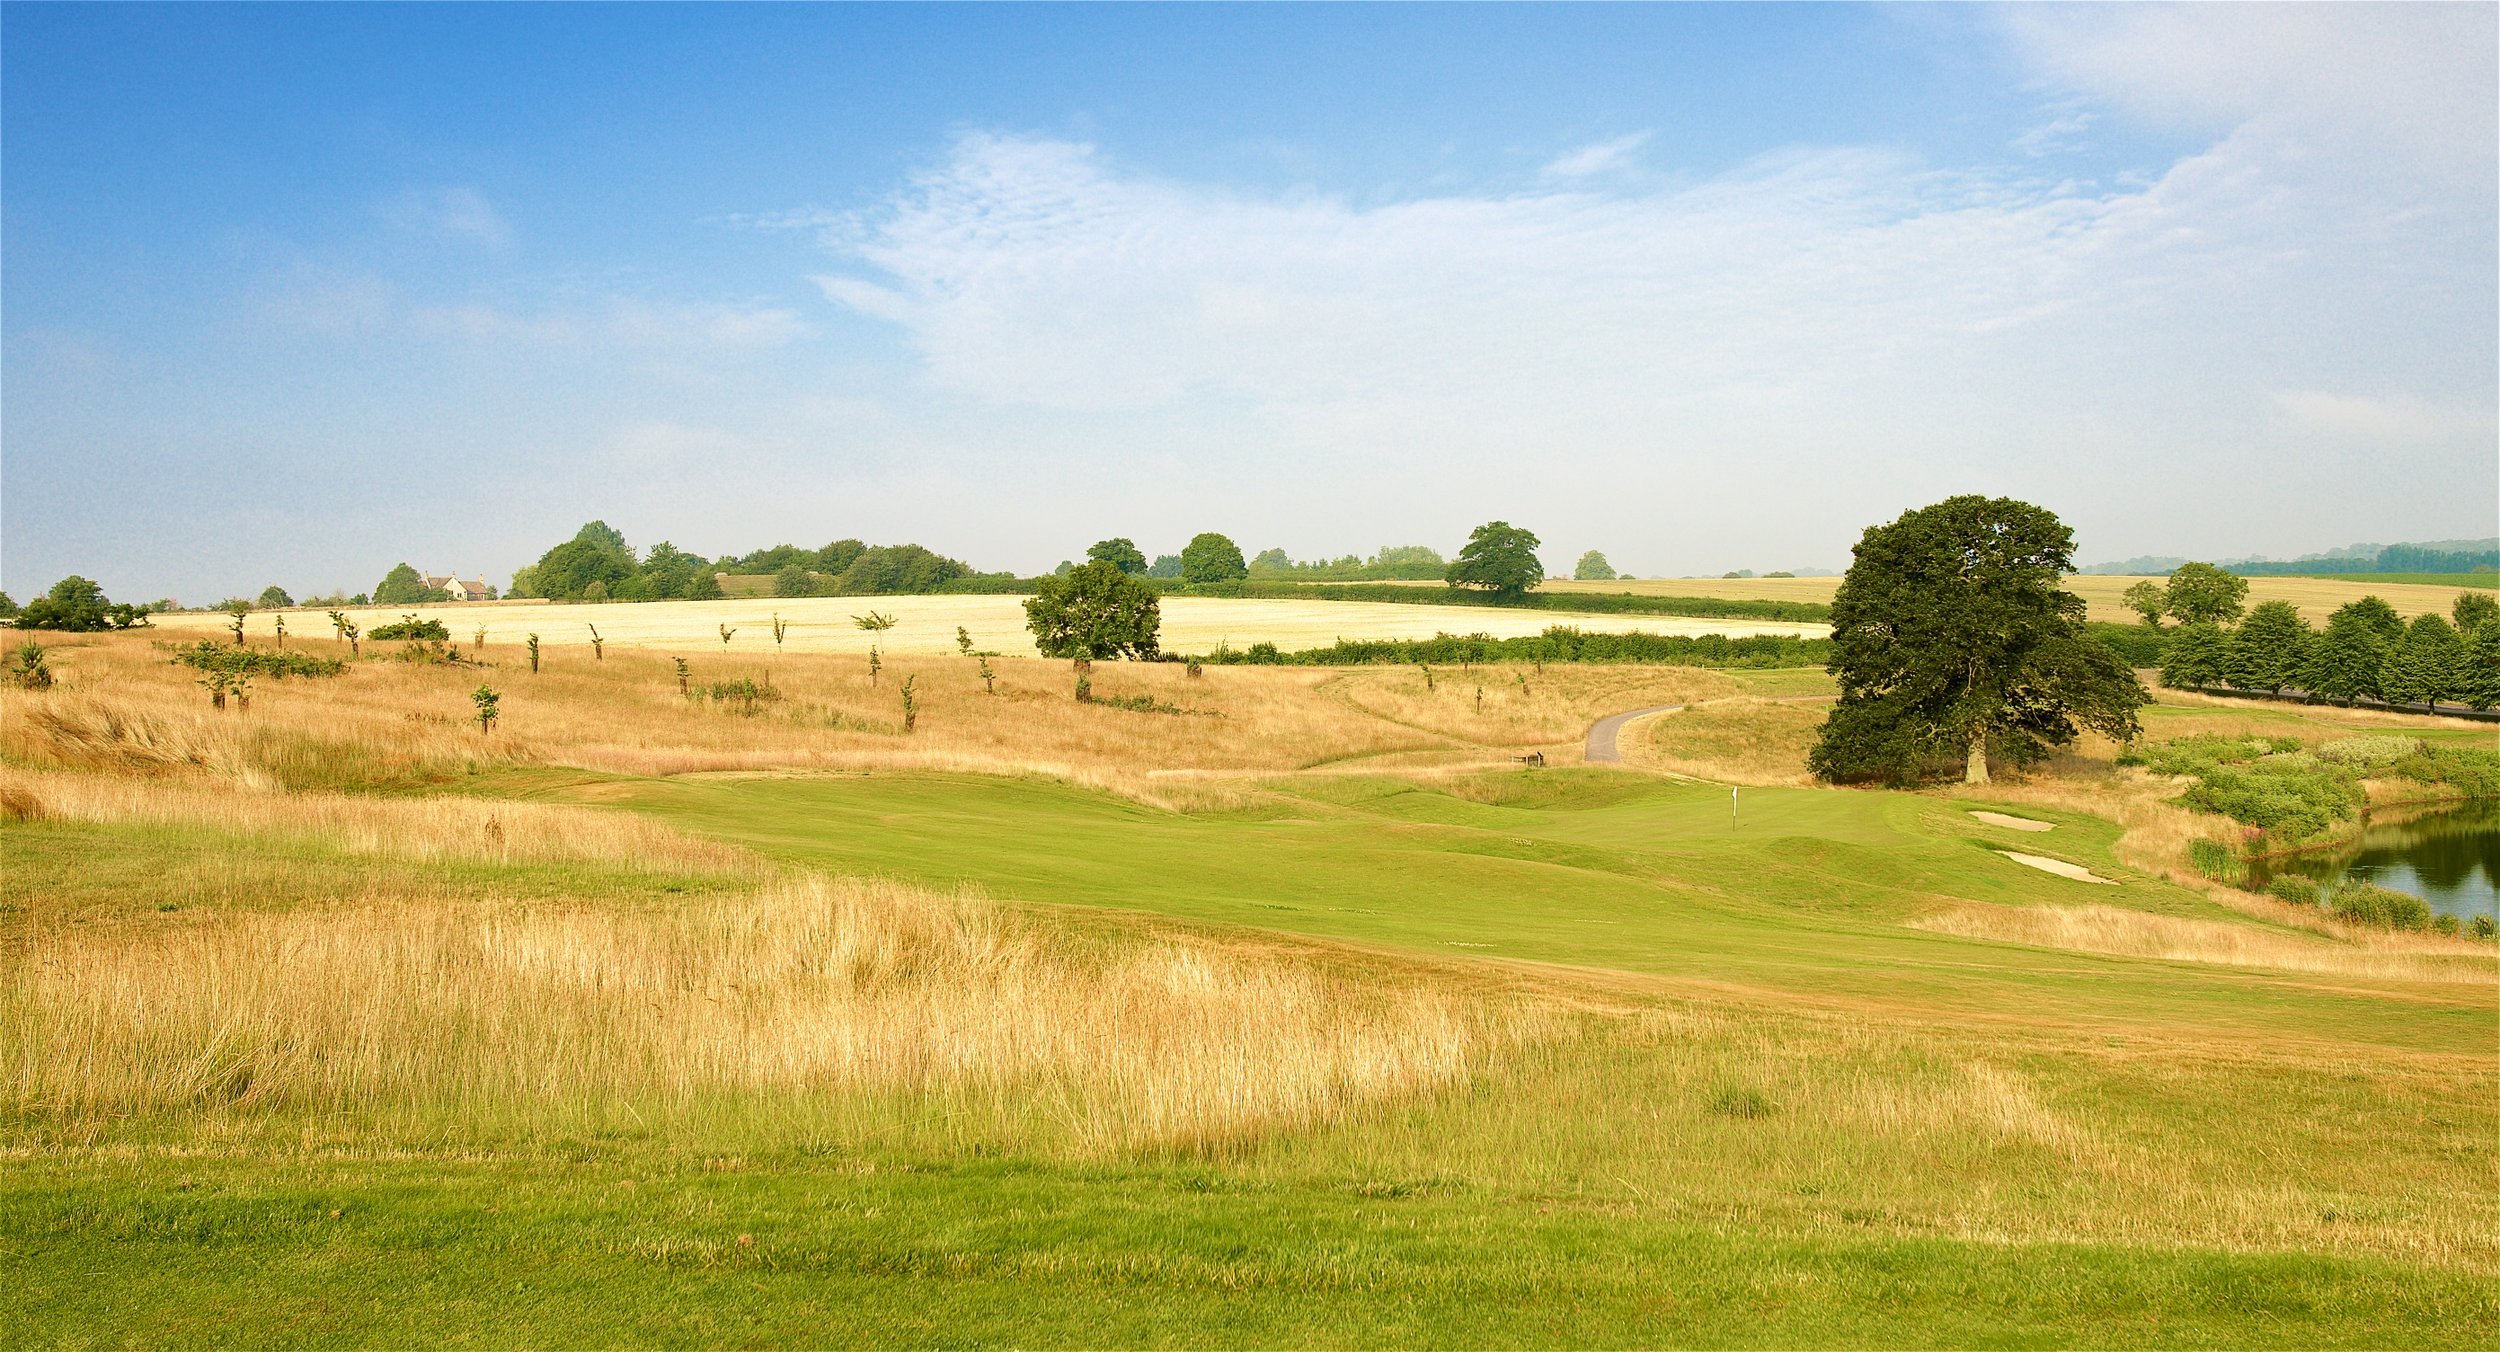
Par Three 4th Hole
A stunning view of the course and challenging Biarritz green awaits you…..
This hole has a twist in it’s tail, as the vast swale in the middle of the green requires great touch with the putter if the flag lies on either tier, especially at the back. Be careful not to over club, as anything long can be very tricky. Bunkers strategically guard the left side and back of the green.
Tees and Yards
Purple: 186 yards
Orange: 158 yards
Blue: 136 yards
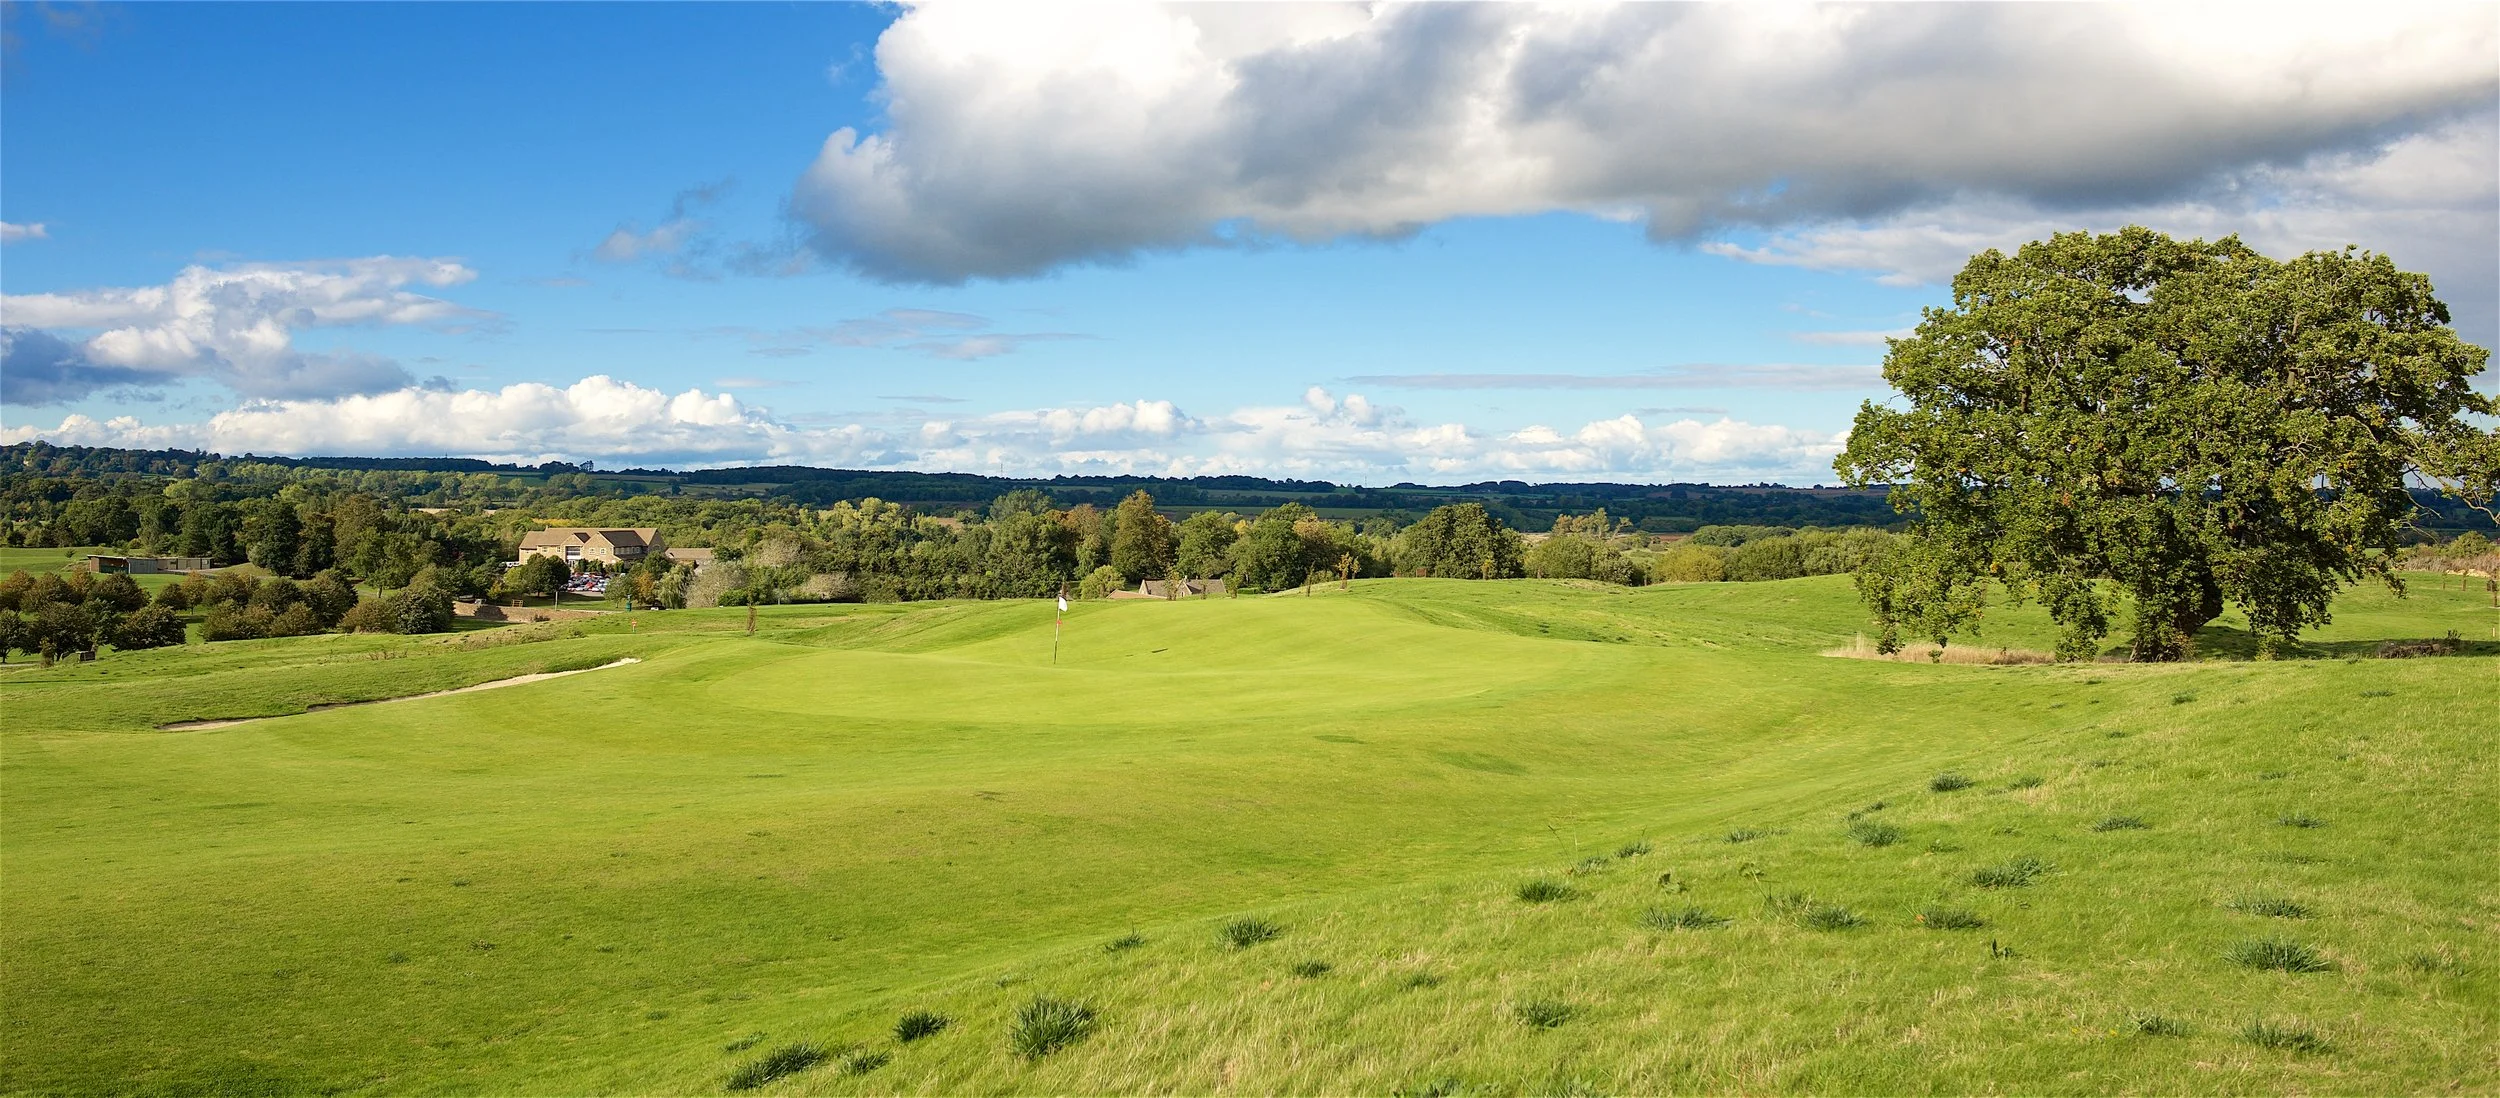
Par Three 5th Hole
The fifth hole is really as you see it but mind the bunker to the front.
A beautiful down hill par 3, to a wide green. Club selection is critical as bunkers guard the front, so it will often play it’s full carry. Many varied pin spots create a different challenge each time it’s played. Playing long would often be a better option than short.
Tees and Yards
Purple: 180 yards
Orange: 144 yards
Blue: 121 yards
Par Three 6th Hole
This hole is really as you see it, beware the hidden bunker to the right.
Another challenging tee shot that can often fall short due the prevailing wind. The pin is less accessible the further back it’s placed, so clubbing correctly is a must. It’s an easier up and down from the right hand side of the green however.
Tees and Yards
Purple: 164 yards
Orange: 140 yards
Blue: 107 yards
Par Three 7th Hole
A stunning view towards the lake from this tee, the hole is nestled into the hillside.
One of the most striking par 3’s you’ll play. An accurate tee shot is required to avoid the water that looms on the right, but a cautious tee shot left will often work its way back to the middle of the green if you land it slightly short.
Tees and Yards
Purple: 172 yards
Orange: 154 yards
Blue: 124 yards
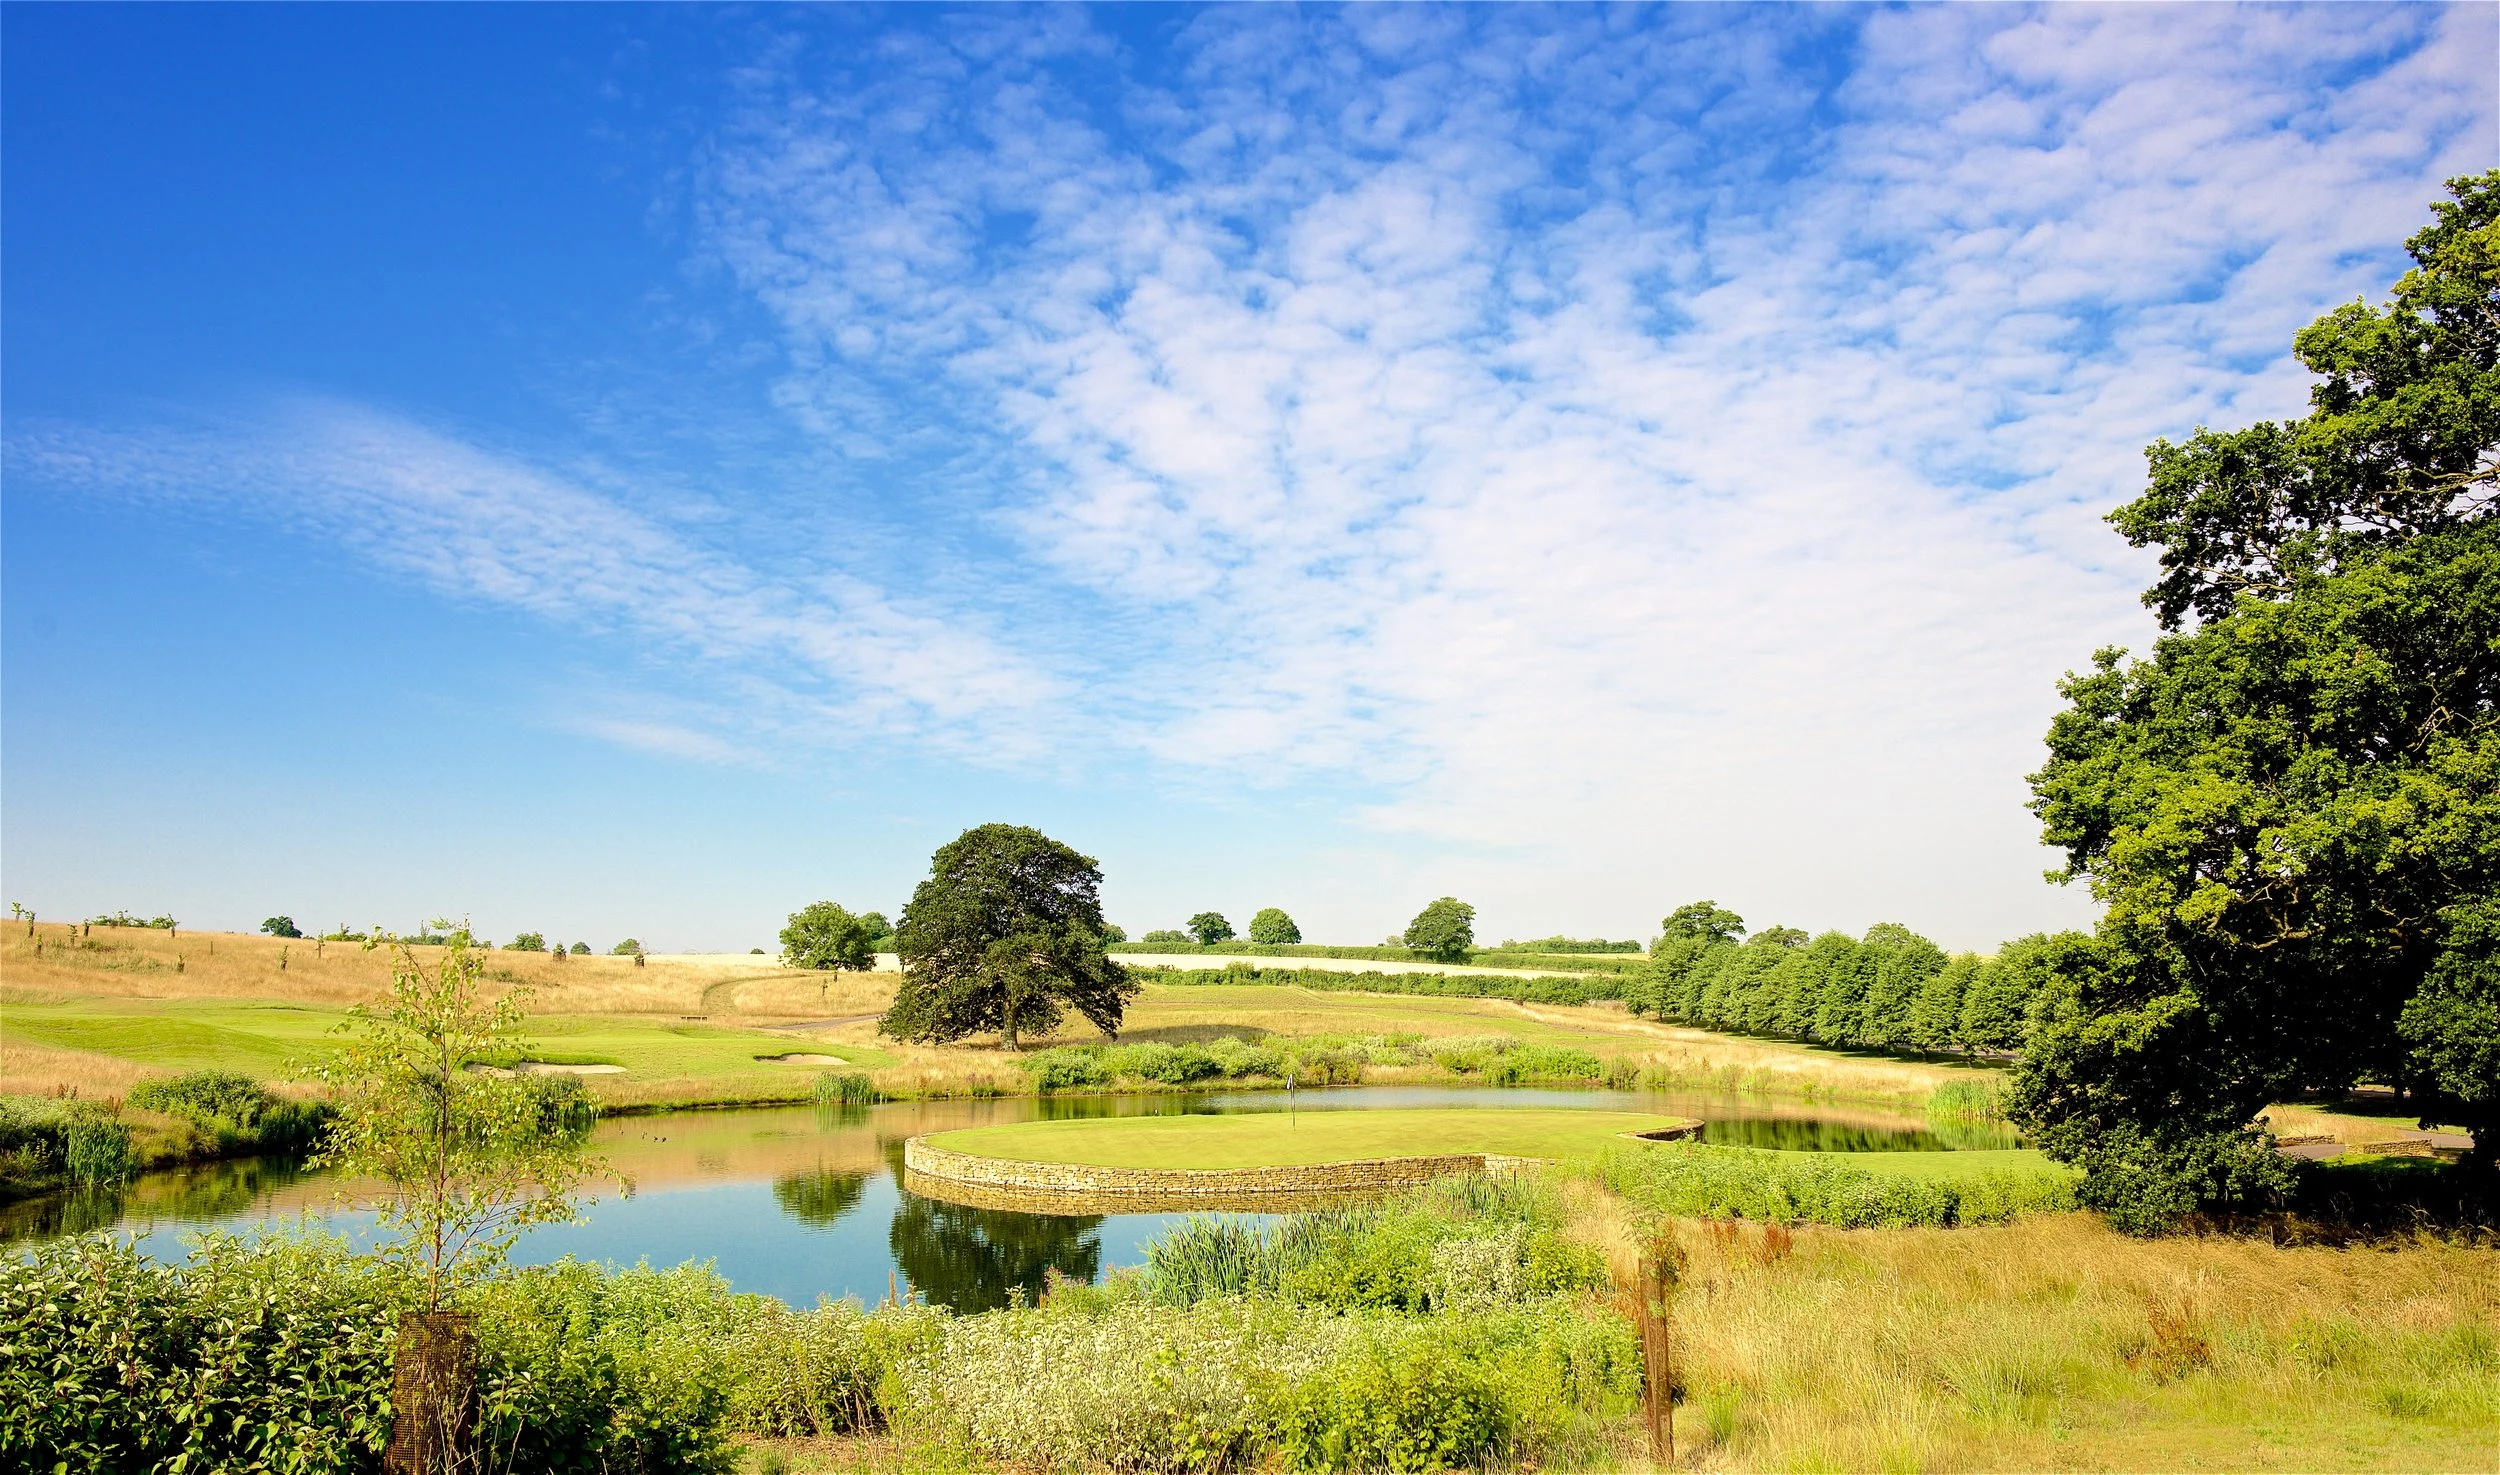
Par Three 8th Hole
The feature hole everyone talks about on this course, an island green with a beautiful stone wall surround. Mind the water, mind the bunker.
Another beautiful hole that requires accuracy and nerve. Always aim for the middle of the green, unless your feeling brave! Any ball finishing on the putting surface will bring welcome relief! Good luck!
Tees and Yards
Purple: 144 yards
Orange: 117 yards
Blue: 100 yards
Par Three 9th Hole
The second water feature on this course is in view at the start of this hole but hopefully should not come into play, the final hole is slightly up hill.
A strong finishing hole that often needs to be aimed slightly right to allow for the slope to bring the ball back to the putting surface. A heavily guarded left side with a deep lipped bunker should be avoided, and the green slopes strongly from right to left, so allow for plenty of borrow when putting.
Tees and Yards
Purple: 150 yards
Orange: 137 yards
Blue: 122 yards
Pro Advice
An amazing finish to any course! Club section is again key here. Check your yardage, the wind direction and find the green. Hole the putt and straight into the 37th hole to celebrate!?!